My project
The project module allows you to view and enter general information about the project you are working on.
Important
To edit the data, you need at least a basic licence. The free licence gives you the right to read only. If you find that the application does not retain what you edit in the forms, you probably have a free licence.
Project description
This is the main page of the project module:
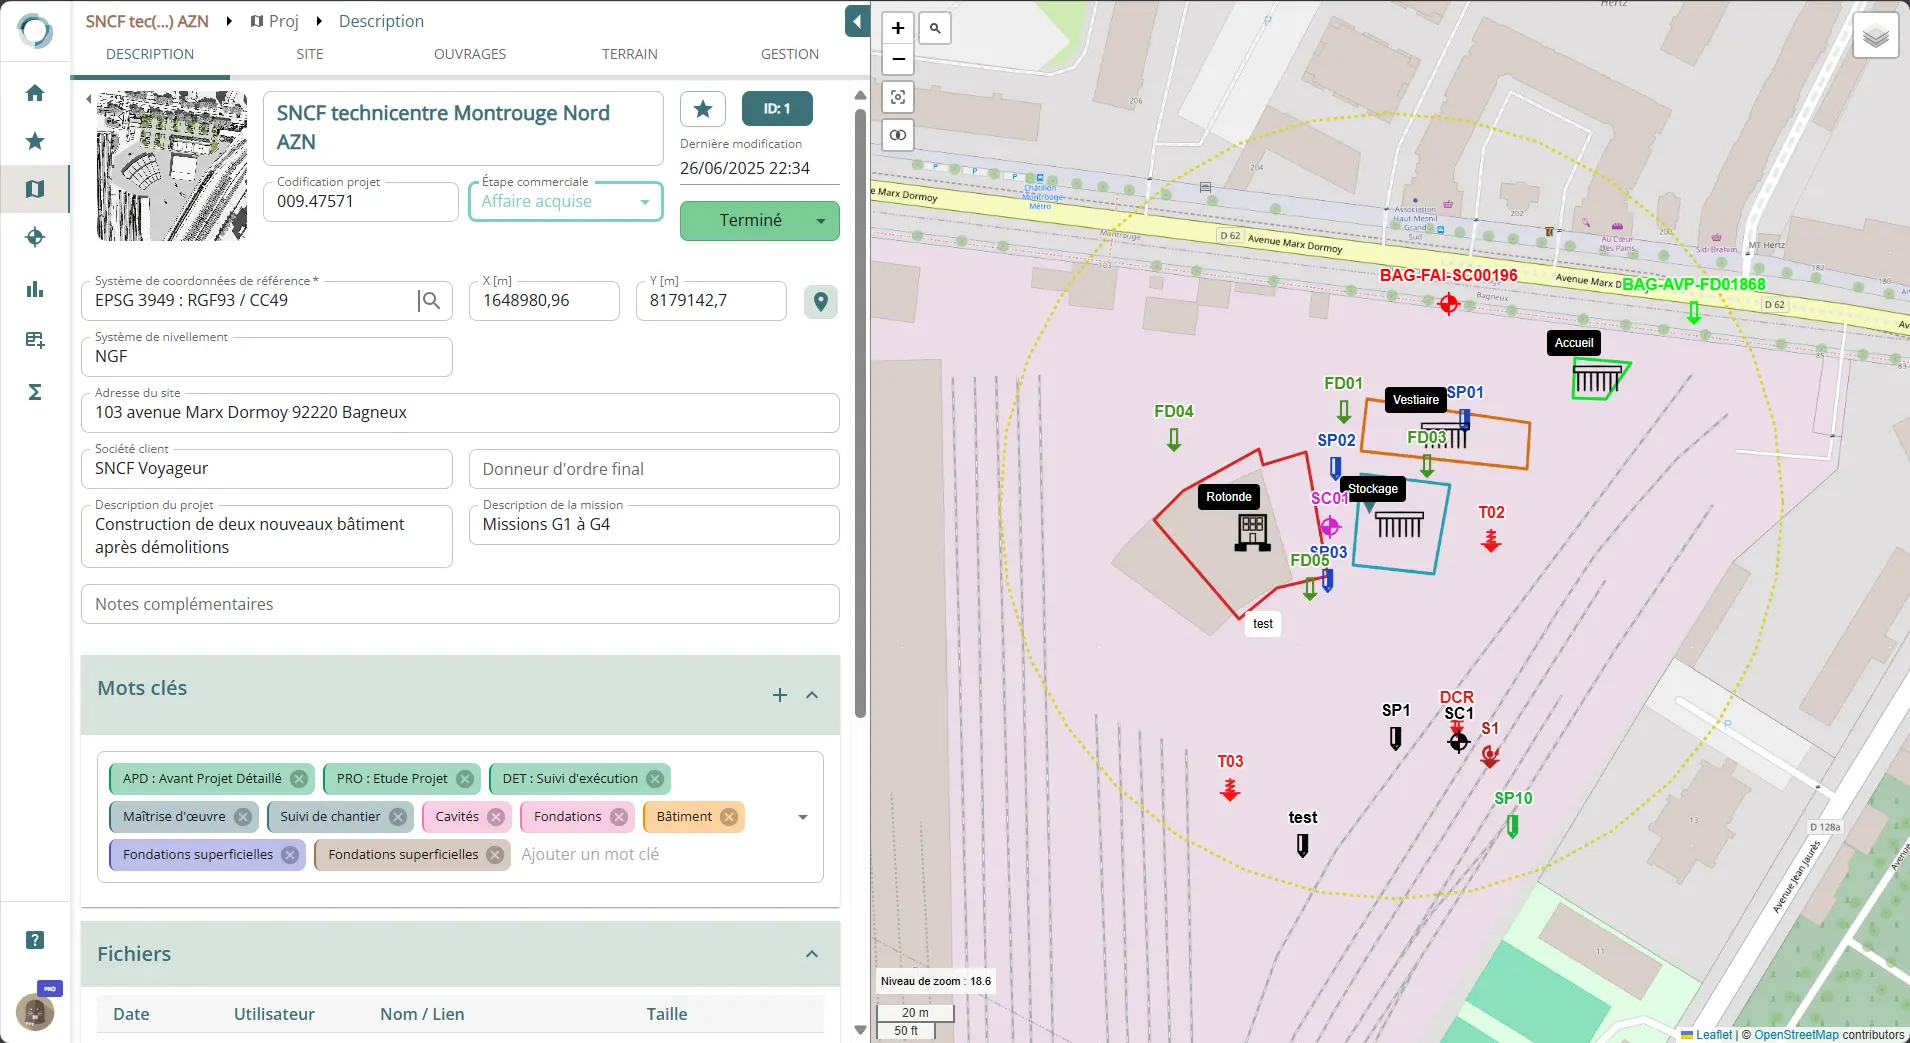
On the right you will see the map of your project and the elements associated with it (layers, structures, boreholes, etc.).
On the left, you can fill in the form describing the project and your company's role in it.
You can :
- change the name of the project (up to 80 characters); please note that the name of your project must be unique in your domain.
- change the reference coordinate system for the project: the SCR will be proposed to you by default when you will create a borehole.
- change the coordinates of the project centre manually or by clicking and dropping.
- select a certain number of pre-set key words by category: these will be used in the future to make it easier to search for projects.
It is also possible :
- by clicking on
 , pin this project to your bookmarks.
 -
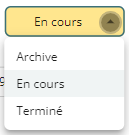
declare the project as archived, in progress or finished:
-
add an avatar/photo to the project by clicking on the small arrow to the left of the project name and then proceeding as for the profile photo.
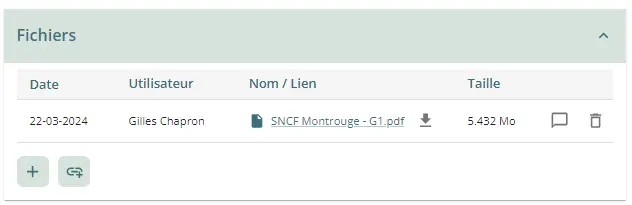
You can attach files and links to your project using the last table at the bottom of the page:
The table at the bottom of the page allows you to manually record a history of the changes made to the pages of your project (addition of a test, calculations, etc.):

Site tab
The second "Site" page of the project module allows you to :
- draw or import layers, i.e. geometries displayed on the map.
- declare polygon-type geometries created in layers as sectors.
- add text annotations to the map
- add map feeds to the project and display legends
Layers and areas
Layers are drawings/plans displayed on the map.

You can :
- name the layer: the interface will alert you if two layers have identical names
- hide a layer on the map using the
 icon
icon - reorder layers using the
 icon
icon - add a comment using the
 icon
icon - delete the layer using the
 icon.
icon. - modify layer style
- declare layer as Sector
Creating a layer
To create a layer, click on the  button.
This disables editing on the left-hand page and causes the following icons to appear in the margin of the map:
Click on one of the tools to draw a marker, polyline or polygon.
Click in the area to the left or press the Esc key to cancel creation.
To finish creating a polyline or polygon, double-click on the last point / close the polygon.
Importing a layer
You can also import a layer using the  button.
Clicking on the button opens your computer's explorer, allowing you to browse for a file.
Orbow supports geojson and dxf vector formats and geotiff raster format. Files must be correctly georeferenced.
Good to know
For the moment, only files smaller than 10 MB can be imported.
If the imported file contains several types of geometry, the application groups geometry of the same type (point, polyline and polygon) in separate layers. All points are therefore grouped together in the same layer, as are polylines and polygons.
Solving Reference System problems
If your geojson file was produced with QGIS or another application, it may happen that the SCR is indicated in your file by its name and not by its EPSG code.
In QGIS, you often have several choices for the same SCR, and some do not reference the EPSG code correctly. To be sure of avoiding the Orbow error "The SCR is not present in the file", cIn your file, check the line of code that specifies the SCR, as follows:
"crs": { "type": "name", "properties": { "name": "urn:ogc:def:crs:EPSG::3946" } }
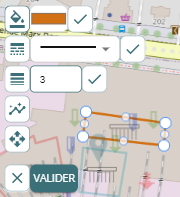
Modifying a layer
You can modify the layers.
To do this, click on  or on the colour block in the style column of the table.
For point layers, you can move or change the size of the marker :
Coming soon
It will soon be possible to change the type of dot icon, as well as its colour.
For polylines and polygons, you can:
- change the color of the border,
- change the contour line type (other dotted lines will be added shortly),
- change the thickness of the border,
- change the line/contour path,
- move the entire layer.
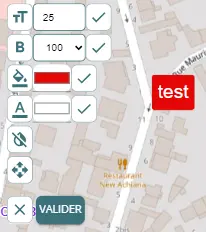
For texts, you can :
- change text size,
- change text weight,
- change text color,
- change background color,
- make background transparent,
- move label.
Export a layer
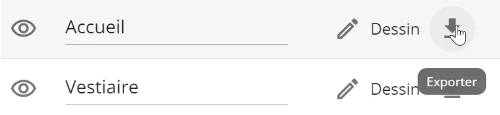
You can simply export a layer (drawn or imported) in geojson format using the dedicated button:
Areas
When a polygon layer is declared as a sector, all objects (structures, soundings, interpreted parameter tables) located or newly created within this polygon are automatically assigned an attribute with the sector name. This makes it easy to create automatic groupings.
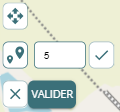
To declare a layer as a sector, simply check the corresponding box. It is automatically checked as soon as a polygon is drawn.
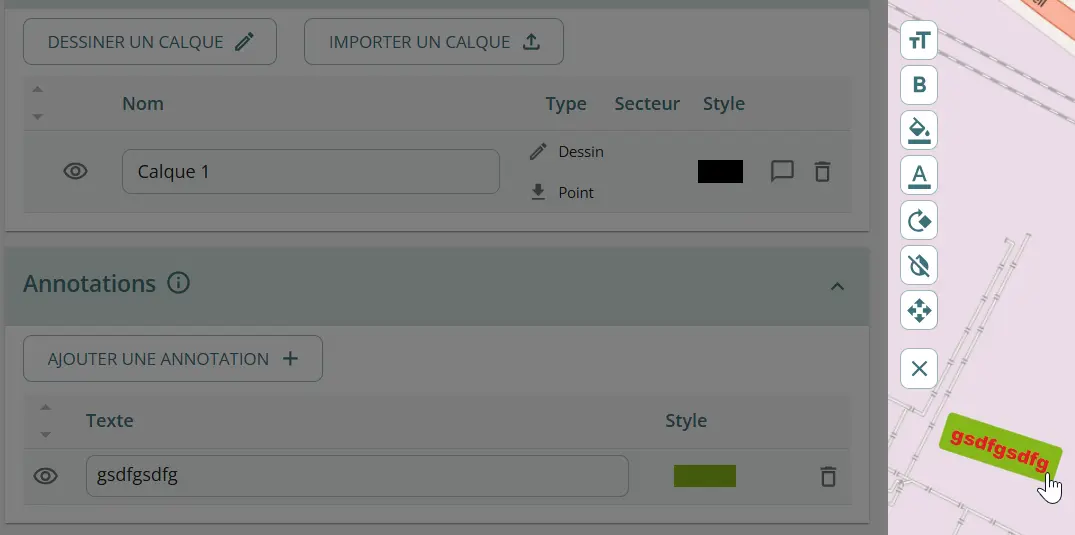
Annotations
The annotation section lets you add labels to the map manually, and modify their style at will.
Map tiles
The flows section lets you add pre-configured Orbow flows to your project. These include :
- geological maps
- risk maps
- cadastre
- old photos
Coming soon
The list of available feeds will be gradually expanded. Don't hesitate to suggest feeds you'd like to see added.
For the time being, flows are restricted to France in particular.
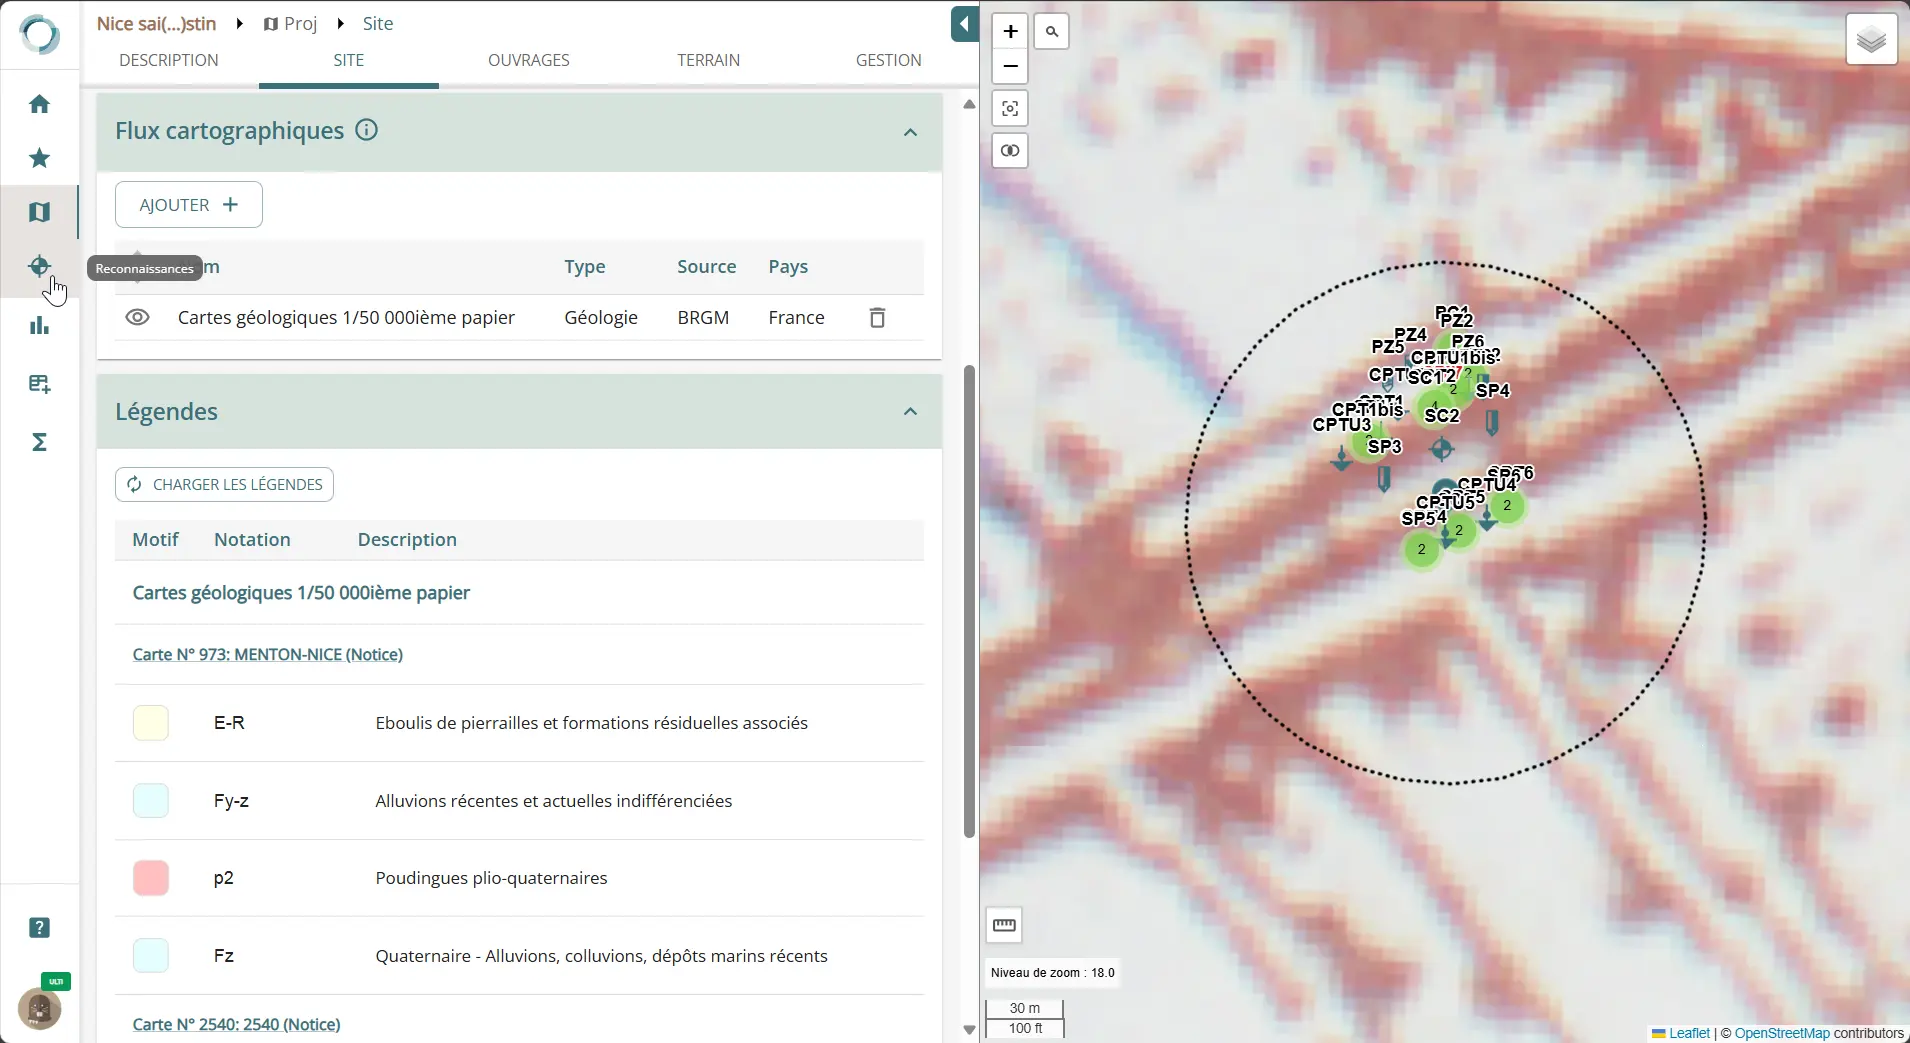
For some feeds, in particular geological maps, a legend section is automatically displayed in the window, and you can press the "load legends" button to display them. A link to the geological map notices is also available.
Structures tab
The third table on the page refers to the engineering structures.
Important
By creating structures, you can associate study cases with them in the calculation module and it is therefore necessary to create at least one to use calculation modules in a project.
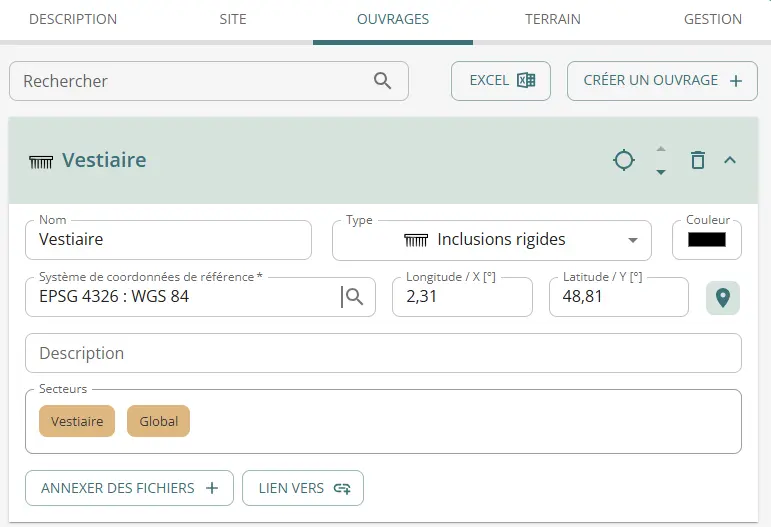
When you click on the "Create structure" button, a new section is created, "Structure XX", with XX incremented according to the number of structures present. You can position the structure precisely on the map, give it a name (which must be different from the others), add a description and attach files/links. You can also leave a comment, reorder or delete the work.
The type of structure is indicative only (icone on map), and does not constrain the types of calculation associated with it.
If you delete a structure to which study cases are attached in the calculation brick, you will have to choose in the calculation brick what to do with the associated calculations (delete or restore the structure).
You can import / export the list of works and associated data using the Excel button.
Ground tab
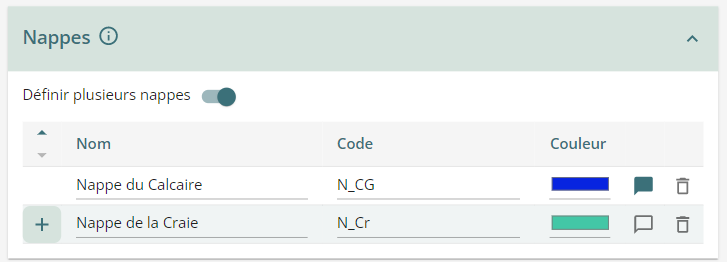
The "Ground" page is used to list the soils and water tables present to the right in the project area. This will then be used in subsequent bricks to allocate data to a particular soil or water table.
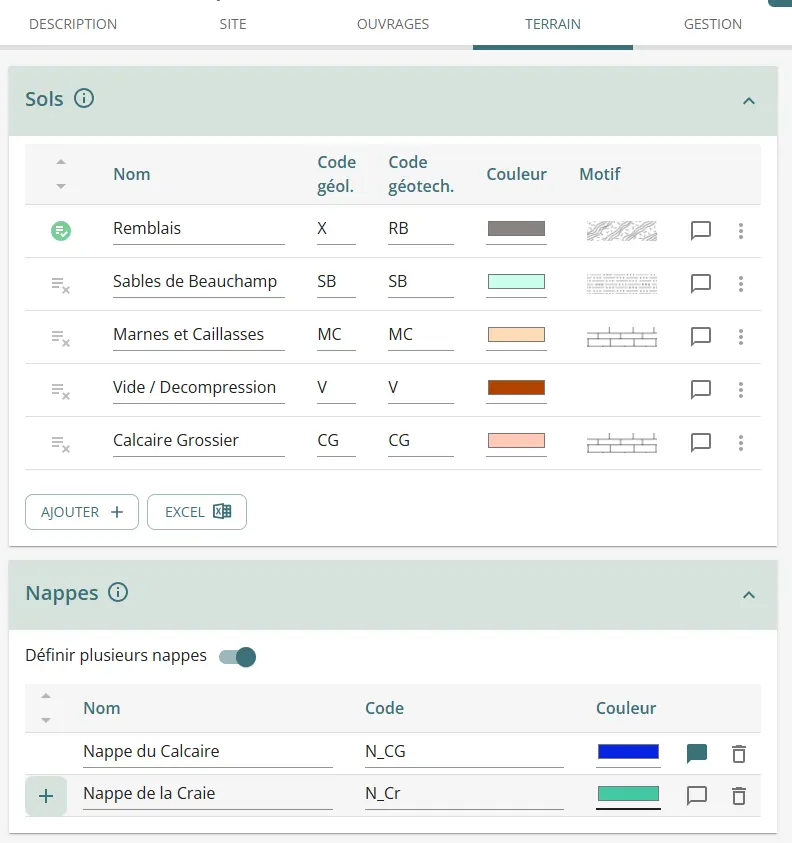
Soils
When a project is created, a single default soil is created. You can modify it and create new soils.
To do this, you need to enter :
- the soil name
- the "geological " code assigned to it, generally an "official" code taken from the geological map, but nothing is obligatory in this respect. In particular, it is possible to use the same geological code on several lines.
- the "geotechnical " code assigned to it. It must be unique for each line. It is this code that will be assigned in subsequent bricks to tests, for example.
Good to know
The advantage of the two codes is that you can identify a layer in the geological sense of the term, for example the Coarse Limestone of Paris, which you can name in Geol Code "CG" (or "e5" if you follow the instructions on the geological map), then break this layer down into "CGa" and "CGs" in Geotech Code to differentiate an altered fringe from a healthy fringe.
- the color you want to assign to the soil.
- the hatch pattern you want to assign to the soil.
Coming soon
Other patterns will be available soon.
You can also write a comment or delete the soil. Deleting a soil is blocked if that soil is used in the investigation data (stratigraphy of a borehole).
You can export / import the contents of this table from an Excel table / csv file using the dedicated buttons below the table. In the window that opens, simply match the columns in your source file to the columns in the Orbow database. See dedicated tutorial
List of soils for the domain
Orbow allows each domain to define a list of common soils that can be used in projects. Soils are categorized by “Geographic Area.”
The operating principle is as follows:
- The administrator can create soils in their domain administration console.
- Users can also submit a soil for registration in the domain list (via the “Add to domain” menu at the end of the soil table row).
- soils submitted by users must be validated by a domain administrator; in the meantime, the icon at the beginning of the line remains orange
 ;
; - when the administrator accepts the submitted soil, the icon turns green
 ;
; - The user can search for a soil in the domain list via the icon
 ;
; - If one of the columns of a soil imported from the domain soil list is modified, it will be considered as another soil, and the icon will therefore turn gray again.
Water tables
In most cases, if you only have one layer at the right of the project, you don't need to worry about the second part of the page.
The application automatically creates a "General" water table when the project is created.
If you have several watter tables in your project, you can use the selector  to create others.
You will then have access to a table in which you can enter as many watter table as you need:
As with soils, the "Code" for each water table must be unique. This code will be used to associate measures (piezometric, for example) with each water table.
You can revert to a single water table by unchecking  . This will reset the table to zero.
Manage tab
This page contains tools for project administration and user management. Its appearance depends on your project rights.
User management
Each project has a list of users with associated rights.
If you are the creator of a project, you will automatically be assigned the role of project administrator.
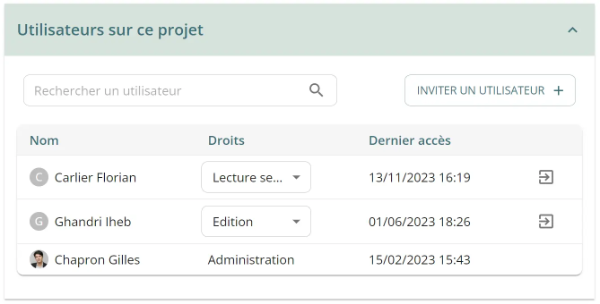
Use the "Invite a user" button to search for a domain user (member or guest) and add them to your project.
You can then give them editing rights to the data in your project.
Important
To invite a user from outside your domain to your project, he must first be invited to your domain.
Your domain administrator must take care of the invitation. Once this has been done, the user will appear in the invitation list. Please also note that a guest of a domain cannot be appointed administrator of a project in that domain.
If the project is shared, the table lists users from all domains in which the project is accessible. An additional column is then displayed, specifying the user's source domain.
The following table lists the user rights according to the role assigned to them in the project.
| Rights v role | Administration | Edition | Read only |
|---|---|---|---|
| See the project | ✔ | ✔ | ✔ |
| Description Page | |||
| Modify the project description | ✔ | ✔ | |
| Site and Ground pages | |||
| Editing data | ✔ | ✔ | |
| Users page | |||
| Invite a user | ✔ | ||
| Modify a user's rights | ✔ | ||
| Expel a user | ✔ | ||
| Administration page | |||
| Go to the project administration page | ✔ | ✔ | |
| Duplicate the project | ✔ | ✔ | |
| Export project | ✔ | ✔ | |
| Modify project confidentiality | ✔ | ||
| Quit the project | ✔ | ✔ | |
| Archive the project | ✔ | ||
| Delete project | ✔ |
Manage the project
On the same page, you can also:
- Restrict access to the project to members of the domain. A restricted project is only visible and accessible to users added to the project (including guests);
- Delete the project. A deleted project is not permanently deleted. The domain administrator can delete it from the projects management page;
- Share a project;
- Save locally ("export" button) all the contents of the project (numerical data for the moment, not the files): the file downloaded to your computer is a json format.
Share a project
There are two ways to give access to a project to a user from another domain:
- by inviting this user into your domain and then inviting him/her to the project: this user will have to go into your domain to see the project;
- by sharing the project: the user, and all members of his or her domain, will be able to view the project directly in this domain (unless it is restricted).
This second option is available via the "Share project" button on the administration page.
This opens a window asking you :
- the name of this domain (for security reasons, we do not share the list of existing domains on the platform);
- the e-mail address of the contact in this domain whom you want to appoint as administrator of this shared project in his domain (he will be able to invite his own users and give them rights)
- if the project is to be restricted to the domain with which you are sharing ;
- if you delegate rights to the administrator on the target domain side.
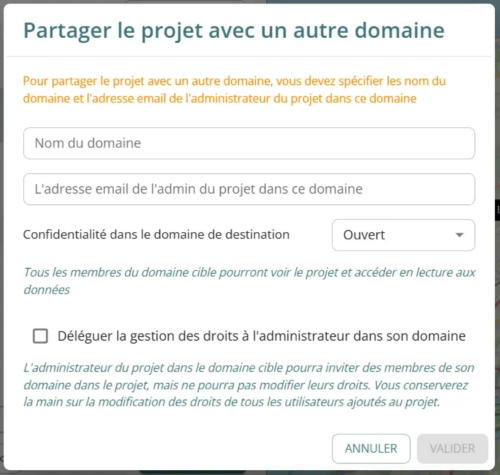
Once this request has been made, the two administrators of your respective domains must validate it.
You need to do this for each domain with which you want to share the project.